Introduction to Shape Nodes - The Cursor
Category: Adventure Game
In this series of posts, I share the process I followed as an amateur game designer to develop an adventure game in Swift using the SpriteKit framework for iOS.
In the realm of adventure games, a significant innovation introduced by Maniac Mansion was the replacement of the text parser with a cursor and clickable elements such as verbs, inventory items, and objects within the scene. This innovation revolutionized user interaction and the usability of adventure games.
While a cursor may not be entirely practical for touch screen devices (iOS), it remains relevant for tvOS and macOS. Therefore, let’s create one using an SKShapeNode.
SKShapeNode
An SKShapeNode is a subclass of SKNode that can display shapes. You can initialize a new shape node with simple shapes like a rectangle or a circle, or assign it a custom CGPath.
The Cursor Node
Cursor extends SKShapeNode. Currently, this class just overrides the default SKShapeNode constructor, but in the future, I will implement additional methods, such as one for moving the shape in response to touch events.
1
2
3
4
5
6
7
8
9
10
11
12
13
14
15
16
17
18
19
20
21
22
23
24
25
26
27
class Cursor: SKShapeNode {

    init(_ size: CGFloat) {
        super.init()

        let spacer: CGFloat = 0.2
        let half = size / 2
        let path = CGMutablePath()
        path.move(to: CGPoint(x: 0, y: half))
        path.addLine(to: CGPoint(x: 0, y: half * spacer))
        path.move(to: CGPoint(x: 0, y: -half * spacer))
        path.addLine(to: CGPoint(x: 0, y: -half))
        path.move(to: CGPoint(x: -half, y: 0))
        path.addLine(to: CGPoint(x: -half * spacer, y: 0))
        path.move(to: CGPoint(x: half * spacer, y: 0))
        path.addLine(to: CGPoint(x: half, y: 0))
        self.path = path

        name = String(describing: self)
        lineWidth = 5
    }

    required init?(coder aDecoder: NSCoder) {
        fatalError("init(coder:) has not been implemented")
    }

}
The custom shape is a path that draws a cross with a size of size (120 points in the GameScene implementation), with a small hole in the middle of size size / 2 * spacer (12 points). lineWidth is set to 5 points to resemble a pixelated design. See below for more details about the size and aspect ratio of the scene and its nodes.
Place a Node in the Scene
I’ve updated GameScene as follows:
1
2
3
4
5
6
7
8
9
10
11
12
13
14
15
16
17
18
19
20
21
22
class GameScene: SKScene {

    static func build() -> GameScene {
        let scene = GameScene(size: CGSize(width: 1920, height: 1080))
        scene.scaleMode = .aspectFit

        return scene
    }

    func setUpScene() {
        let cursor = Cursor(120)
        cursor.position = CGPoint(x: frame.midX, y: frame.midY)
        addChild(cursor)

        backgroundColor = .darkGray
    }

    override func didMove(to view: SKView) {
        self.setUpScene()
    }

}
build is a static constructor used to create new GameScene instances. It is used in each target’s view controller as follows:
1
2
3
4
5
let scene = GameScene.build()

// Present the scene
let skView = self.view as! SKView
skView.presentScene(scene)
The setUpScene method is invoked in didMove, which executes when the scene is presented by a view.
This method is responsible for:
- Creating a new
Cursorinstance - Placing the cursor at the center of the screen,
(frame.midX, frame.midY) - Adding the cursor to the list of children in the scene nodes hierarchy
- Setting the scene background color to
darkGray
Note: A node is displayed only if it’s part of the nodes hierarchy of the scene currently presented.
Note: In this scene’s coordinate system, the origin is located at the bottom left corner of the screen.
Design Note: Low Res (Pixel Art) vs. High Res
This is primarily a stylistic choice but has implications for how we draw objects in the scene.
For instance, rescaling pixelated textures should be done using the nearest filteringMode to keep pixels crisp.
Another issue with pixel art is the risk of mixing pixel sizes in a high-res environment. For instance, the cross path we’ve designed has a 5-point line width, but the hole inside the cross measures 12 points, which is not a multiple of 5. A better approach might be to keep the scene size small and rescale its contents to fit the screen. However, when I tried this, rescaled shapes’ edges did not appear crisp, and I could not find a method to apply a different filtering mode to the whole scene. An easy solution might be using textures for all game elements, but I don’t want to impose this constraint at the beginning of the development process.
Personally, I like pixel art, but I’m still undecided about choosing it for this game.
Two additional reasons in favor of a pixelated design are:
- Retro style aligns with the classic adventure game aesthetic.
- Easier to create art (though I am not entirely sure).
Scene Size, Coordinate System, Resolution, and Aspect Ratio
These are topics I plan to discuss in more depth in a later post. For now, let’s say I’m taking a shortcut. I’m fixing the scene size to 1920x1080 points and setting its scaleMode to aspectFit.
This setup allows me to use a static coordinate system. For instance, a node positioned at (100, 100) will be visible at the bottom-left corner of the scene on every device.
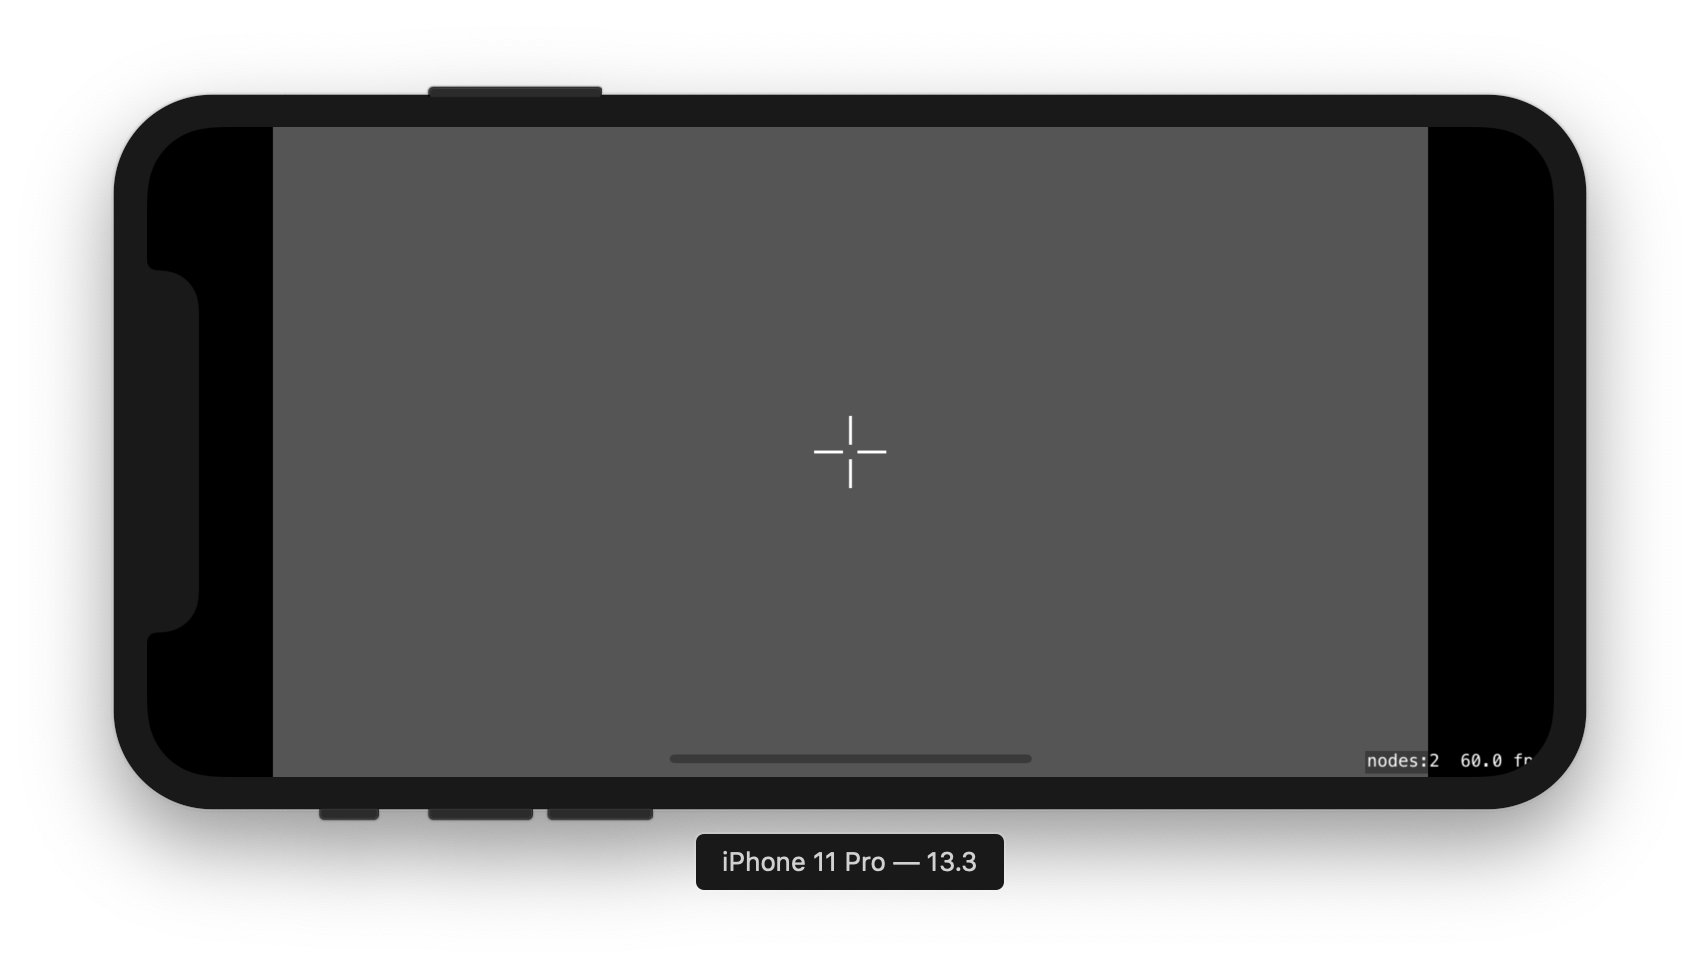
The chosen scale mode tells SpriteKit to fit the scene into the device’s screen size. This means screens without a 16:9 aspect ratio will display black bars, either vertically or horizontally, depending on the screen size.
For instance, iPhone X Pro devices will display vertical borders (landscape orientation):
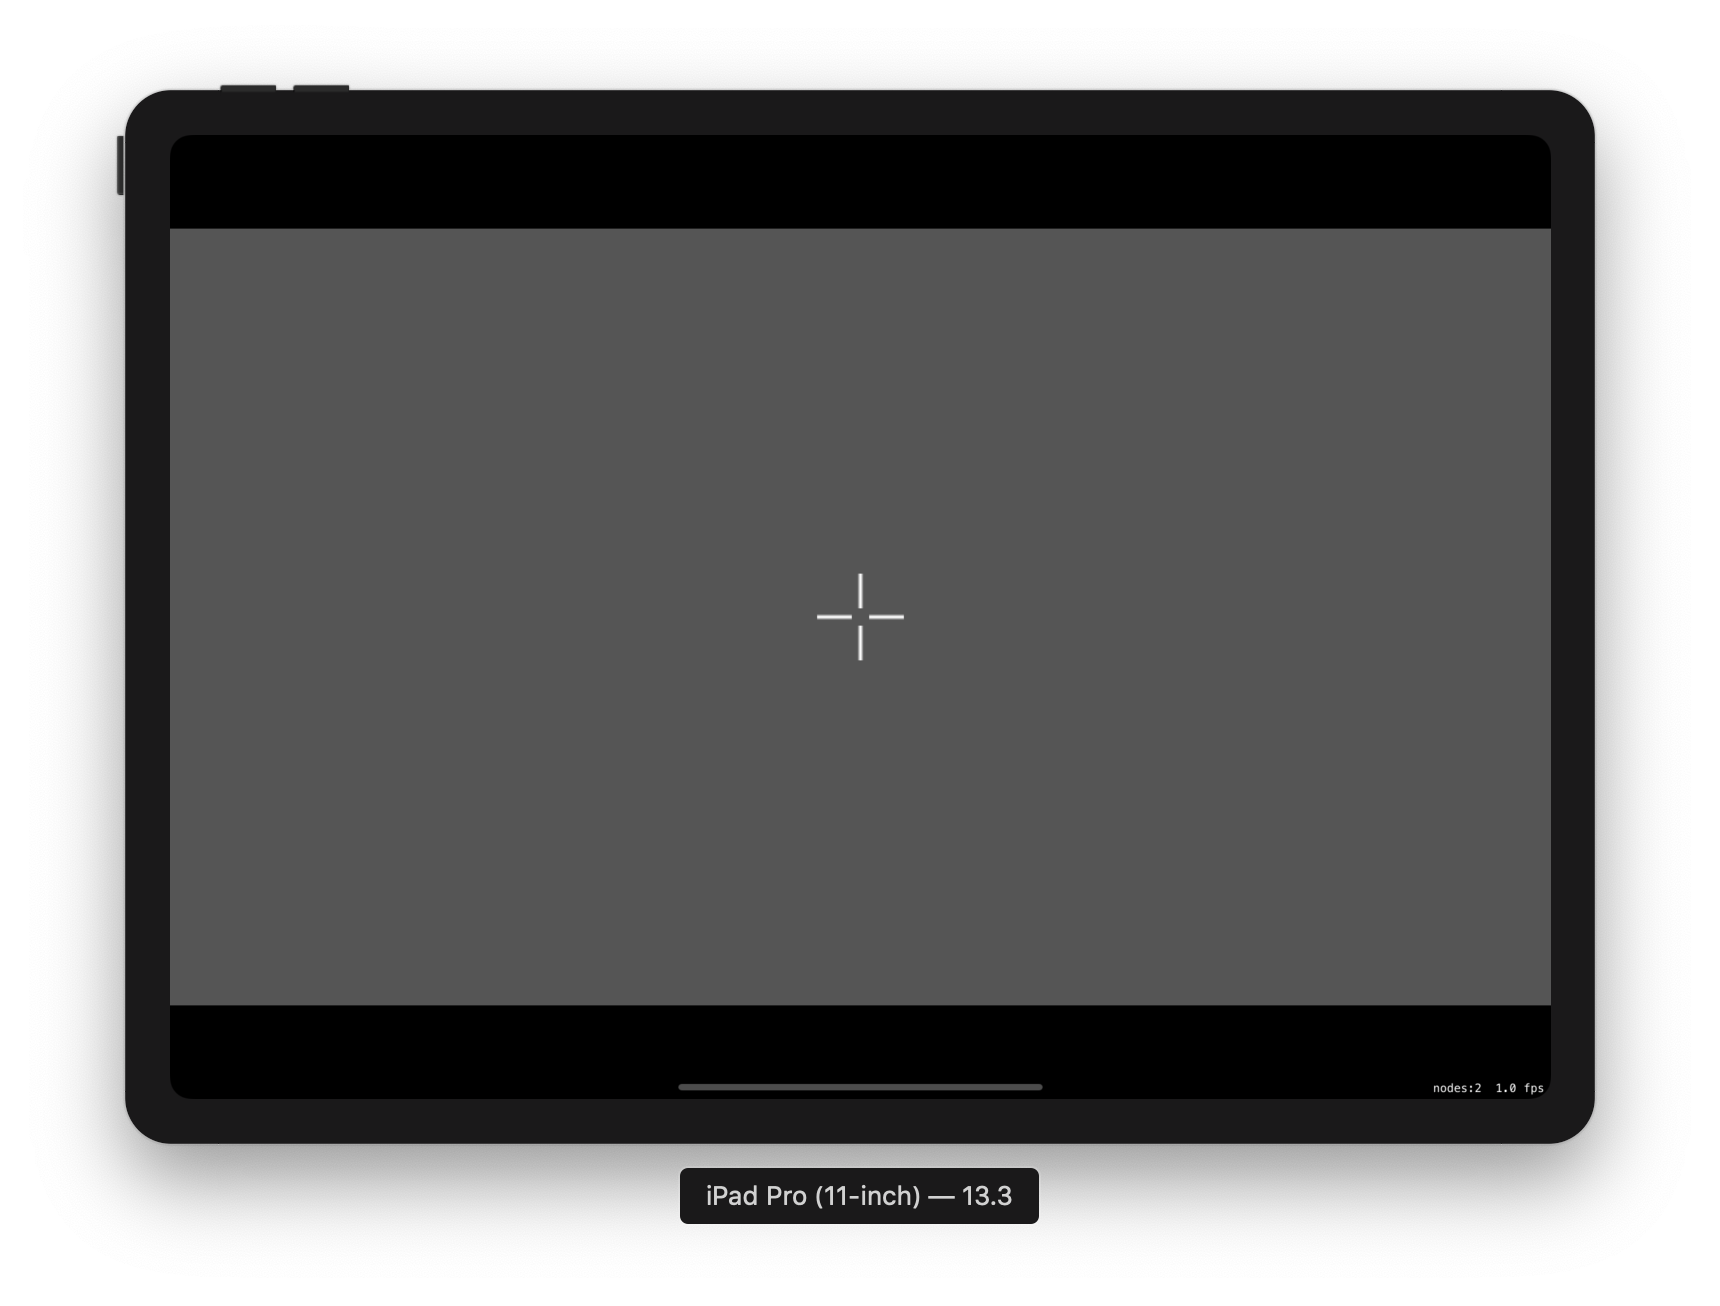
while iPad devices will display horizontal borders (landscape orientation):
Conclusion
I’ve just drawn the first shape in the game, and it’s beautiful, but I’ve already encountered two issues:
- Scene size and whether it should be device-dependent or independent
- Design style: low vs. high res. If choosing low res, how to maintain consistent pixel size without disrupting the rescaling of textures and shapes.
I consider both issues non-blocking and will ignore them for now. I’ll find a way to manage rescaling issues later.
In the next post, I’ll discuss touch events.